When making a pitch presentation video there are plenty of options available to you, from limited to fully featured professional desktop software, as well as third-party service providers that can do these for you.
However, for those wanting to give it a go themselves, there are some free* options worth trying.
NOTE: this guide is for editing a video you have made. If you have not made a video yet, try our OBS Studio guide here.
Please be aware, the software mentioned in is this article is a 3rd party product. Use of which is at your own risk. The article was accurate at the time of writing but any change or removal is beyond our control.
OpenShot video editor
https://www.openshot.org/
Available for Windows/Mac/Linux
OpenShot is a free, open-source video editor. Its designers aim for it to be an easy to use, quick to learn and surprisingly powerful, which is good because that is just what we need.
OpenShot can be downloaded from the project website for the operating system you use here.
NOTE: For this guide we are using windows10.
Install OpenShot and launch it.
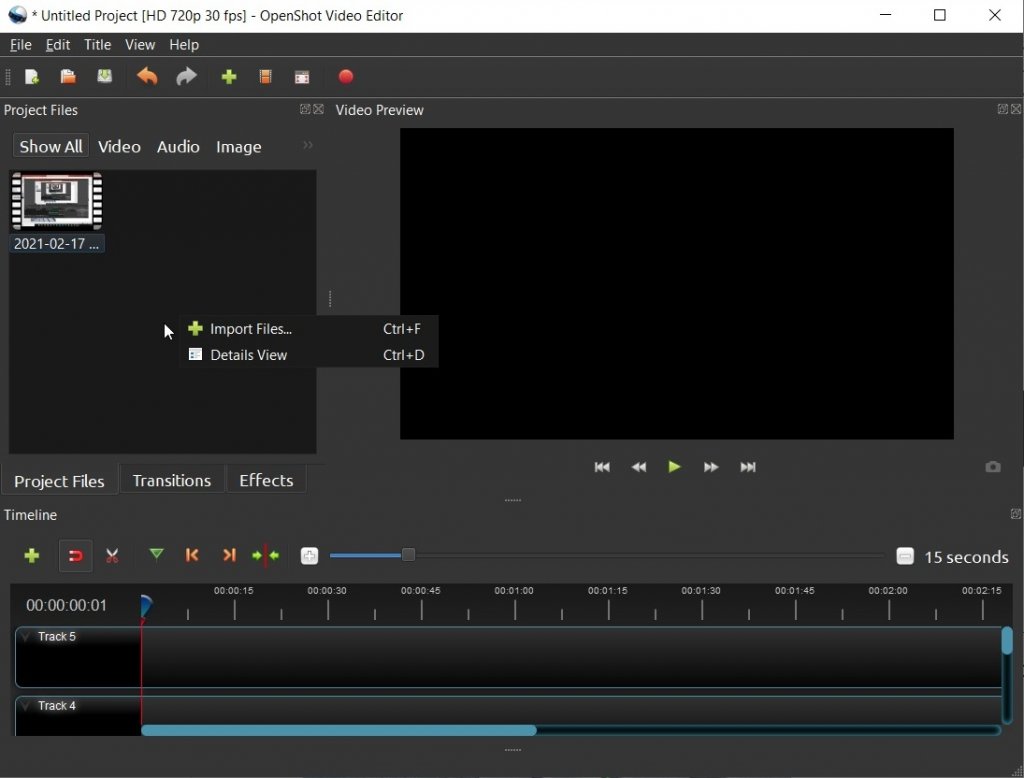
Once the OpenShot dashboard is up, the first thing you will want to do is go to the ‘Project Files’ panel on the left and add you video(s).
You can either do this by left clicking in the panel and selecting ‘+import files…’ then, in the file explorer window that opens, browse to the file location, click on the video, then click ‘Open’.
OR you can drag and drop the video file(s) directly into this panel.
Once you have your video(s) imported, drag and drop what you want to edit from the ‘Project File’ panel into the video ‘Timeline’ at the bottom of the dashboard.
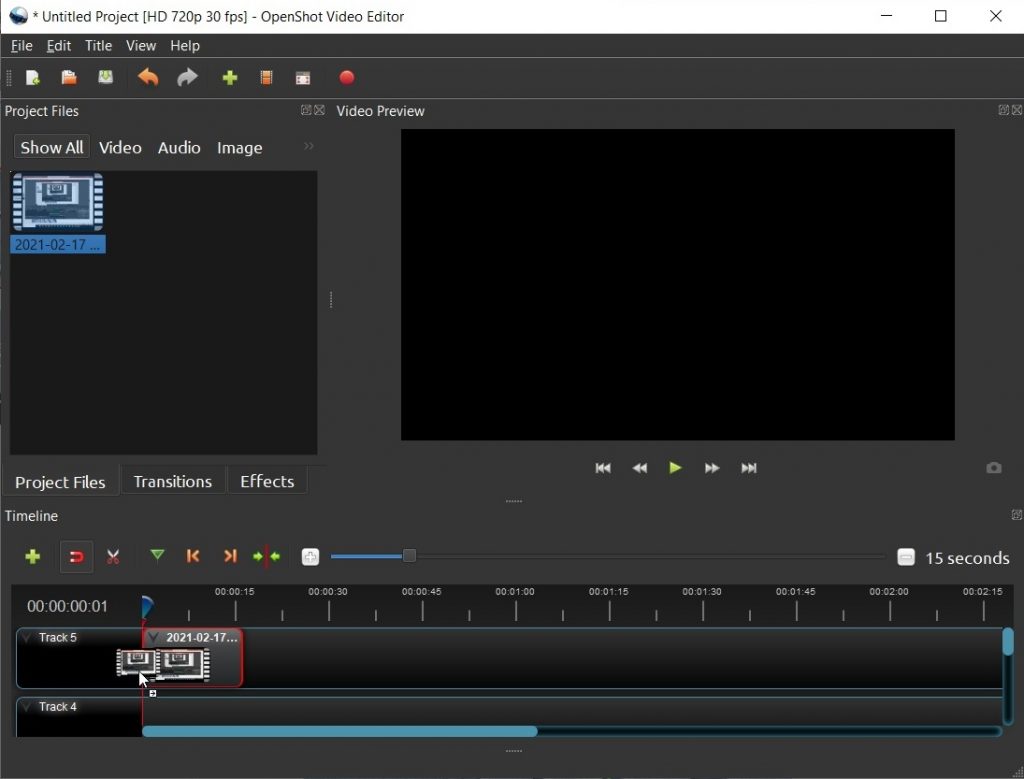
You can place videos anywhere along the timeline, so make sure you slide the video hard to the left so they start at the beginning of the timeline.
NOTE: You may notice that there are multiple tracks available in the timeline. This is to allow users to mix between different overlays, videos and audio files. For this guide we will be keeping things simple and just using 1 track.
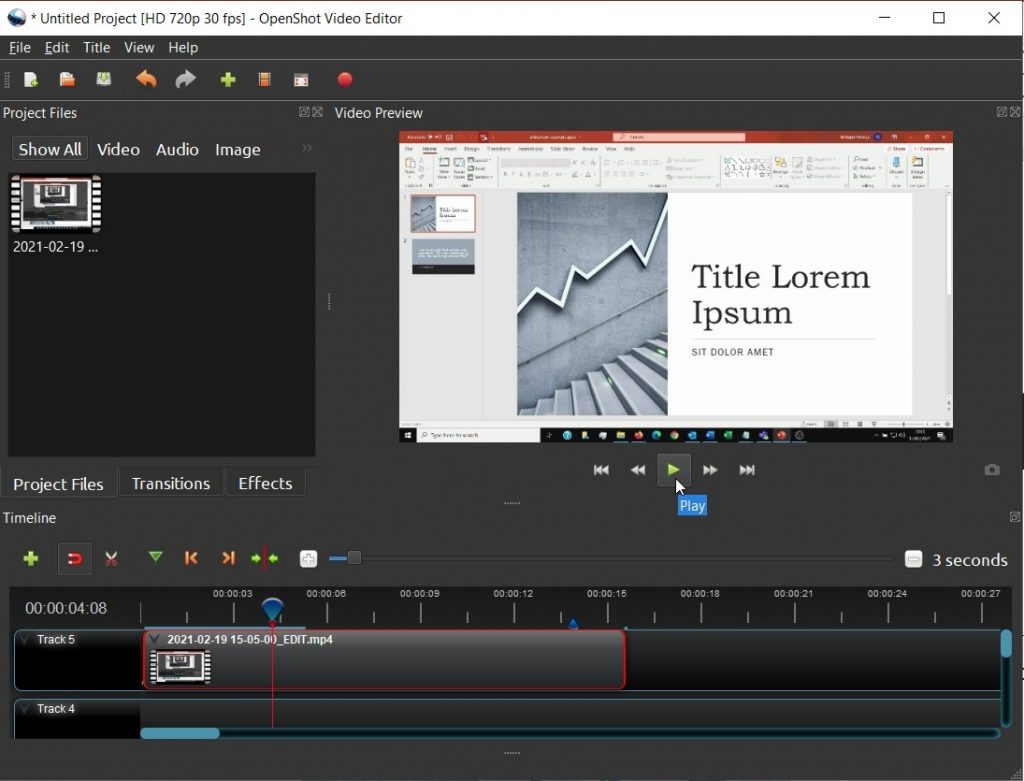
You can use the ‘play’ button in the preview panel to watch the video from where the play bar marker is as any time.
The main tool to use is ‘razor’ which can be used to split the video up. You can then move or remove the bits to get the final version you want.
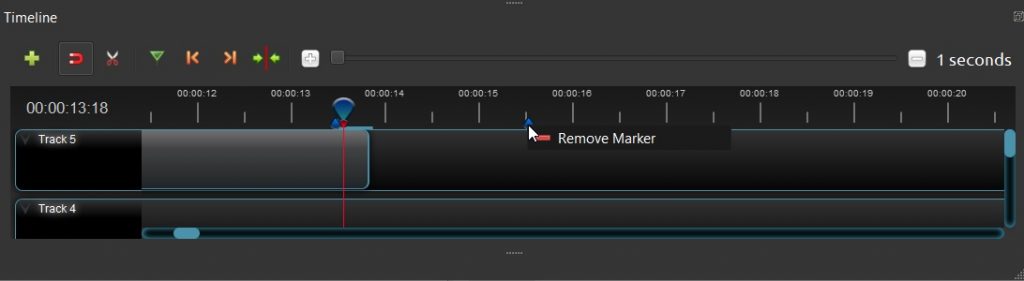
Before using the razor tool, you will want to know where to split it. An easier way to do this is by placing a (blue) marker at the location you want to split to make sure it is in the correct spot.
To do this, play the video until you are close to the location you want to split. Pause the video for a moment, hold the [CTRL] key and roll the mouse wheel to zoom in, this will make it easier to place the marker more accurately. You can use the slider at the bottom of the Timeline to move the view left and right.
Play the video and click ‘add marker’ at the point you want to make the split.
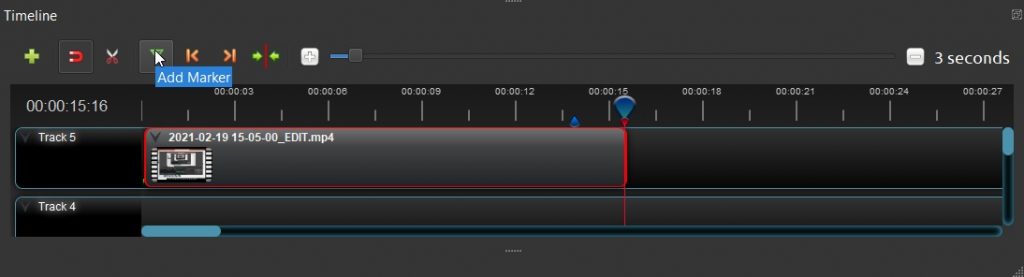
It doesn’t matter if the marker is not exactly on the right spot, this is just a visual guide to help with splitting later.
Click the ‘previous marker’ icon to move the play bar back to the marker and play again.

Repeat until you feel comfortable with where you are going to split using the razor tool.
If the marker is wildly out, you can place another marker using ‘Add Marker’. You can remove a marker by right clicking on the one you do not want and selecting ‘-remove marker’.
You are ready to make your first split with the razor tool.
Click the scissor icon to activate the ‘Razor Tool’, this will allow you to split the video on the timeline wherever you have the mouse pointer.
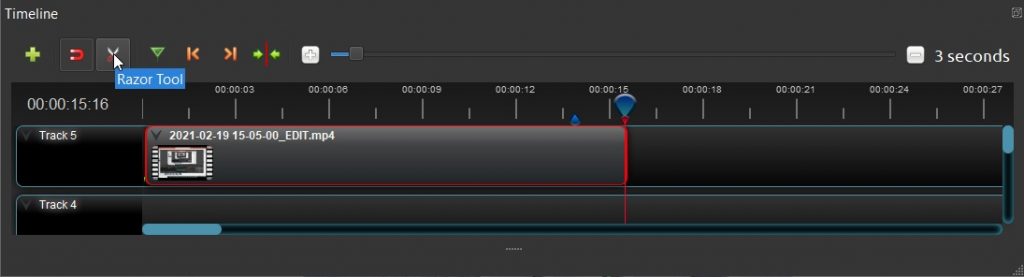
Move the mouse pointer to the point you want to use the razor tool to split and left click.
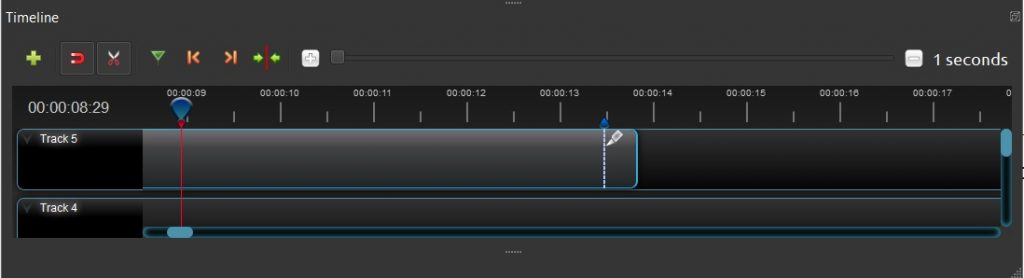
If you feel it is not split in the right place, you can undo the edit either by clicking the back arrow at the very top of the OpenShot dashboard or by pressing [CRTL] + [Z] twice.
When you have finished using the razor tool, click the scissors icon again.
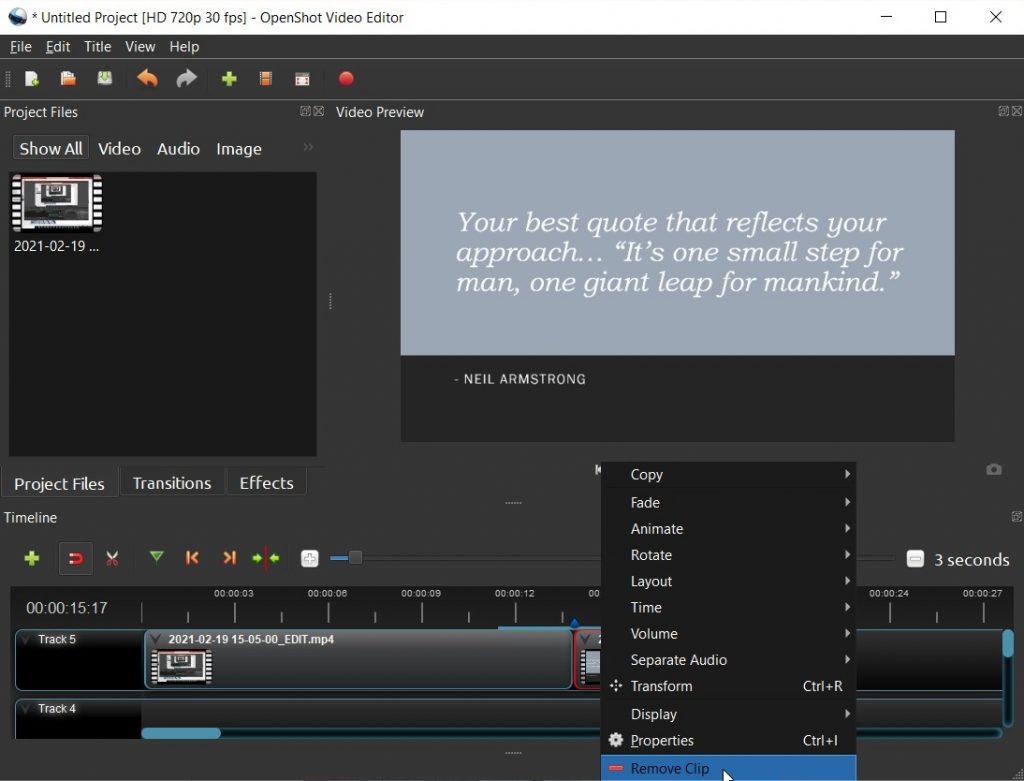
You can remove the segment of video you don’t want, by right clicking on it and selecting ‘-remove clip’ or by clicking on the clip and pressing [delete] key.
Continue editing until you are happy with the result. You can use the ‘Video Preview’ to the watch the full video and make sure.
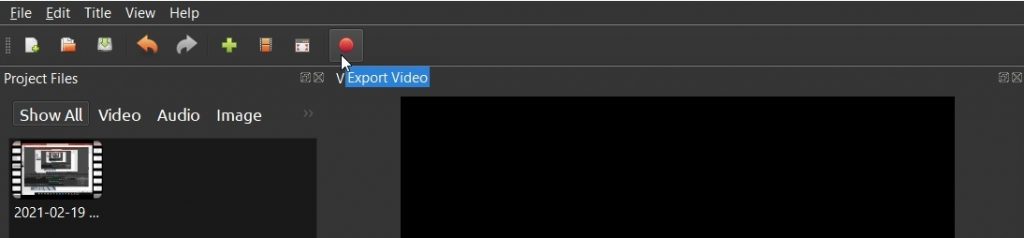
To save the video you have created as a .mp4 file, click the red dot icon at the very top of the dashboard to export the video.
In the window that appears check the file name is appropriate, and the location it is saving to.
You will also want to check the ‘Target’ format is ‘MP4’ and the resolution and framerate is at least as good as the original recording. Generally HD 1080p at 30fps will be fine.
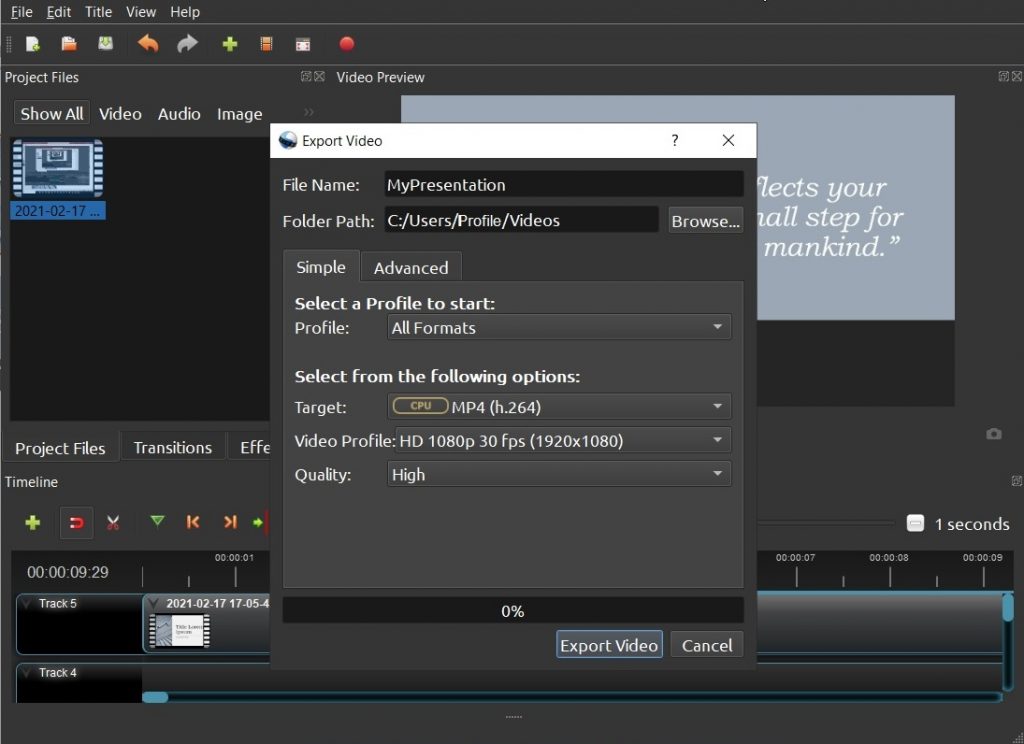
Then click ‘Export Video’. Please be aware, depending on the length of the video and the power of your computer, this could take some time.
Congratulations, you have finished creating your presentation video.